How To Wrap An Ankle – (Ultimate Step-by-step Guide for Beginner with Pictures)
Learning how to wrap an ankle sprain correctly is worth to know a skill that can help you in many of your significant incidents.
To gain a professional way of wrapping, one needs to know its right steps and the amount to do the work correctly.
Applying the correct and suggested actions in the wrapping process can make you a professional in this skill, and you can assist yourself in several stages where you need a bandage to your ankle.
Some incidents where you need to wrap your ankle could be:
- A sprained ankle
- Pain in your foot
- Swelling in ankle
And other of the typical occasions occurs to your foot or ankle can be treated by learning to wrap by your own. Therefore, gaining a skill to wrap your ankle is worth learning to solve your issue at your home.
Suggested posts:
- How Long Does It Take a Sprained Ankle to Heal Completely?
- How to Heal a Sprained Ankle Overnight Fast for Instant Pain Relief
[alert type=”info” icon-size=”normal”]
So, in this article, you are going to learn the step-by-step guide that will show you how to wrap an ankle sprain correctly right in your home.
By understanding the techniques listed below clearly, understandably and applying them practically, you can become a professional wrapper for you and your family members.
Let’s start learning! [/alert]

Acquiring the required items:

Before learning how to wrap an ankle sprain correctly, first, let’s get to know what kind of items you’ll need in the first place to get the job done! Here are few things that you need before starting the process of wrapping:
- Get a plastic bandage
- Choose the quality bandage for you
- Get a wider bandage
- Clippers (another necessary item)
- Or get one which is comfortable for you
- To the end of this section
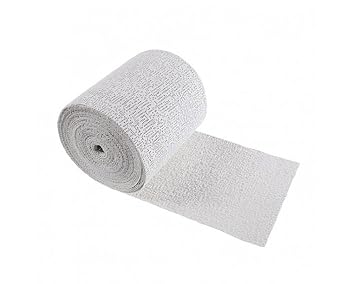
Get a plastic bandage:
Since the very first necessity is definitely a bandage and if it’s possibly a plastic one, then it is going to be the best choice, so we recommend plastic bandage for the better results.
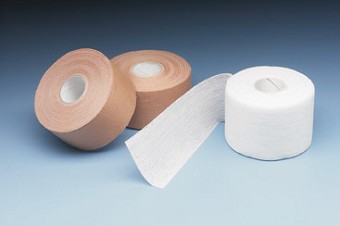
Choose the quality bandage for you:

You can acquire any of the dressing that comes under your expense, but it will be better if you choose the ACE bandage which is stretchable and is supposed to be good ones and can hopefully found at the store near your area.
Alternatively:
Cloth typed bandages are a definite choice for selecting for your sprained ankle, one of their best use is that you can reuse them more than once in future just by washing and keeping them secure.
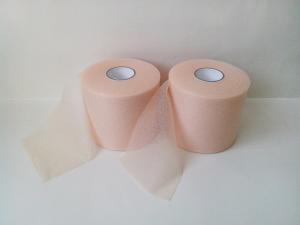
Get a wider bandage:
More great dressings are recommended for sprained ankles, one with the width of 1.5 to 3 will be the better pick. As more large your bandage is, the easier it will be to cover your ankle as well as almost the entire foot.
Clippers (another necessary item):

Bandages should be capable of sticking tightly and entirely on your foot to keep stay set for a long time. The standard way of making this possible is getting bandages that come up with clippers that join an each of the layers and holds it for a long.
Or…
If you find difficulty in getting wrappers with clippers, don’t worry, you can tie as well as stick them powerfully just by using a dressing tape on them. All you will need is to directly apply the tape at the last and the top remaining part of the bandage.
Or get one which is comfortable for you:

If you are among those who cannot bear the dressing on their foot for days or mainly in the hot summer days, we recommend you to search those which contains open holes that make the job of ventilation possible to your ankle.
The light and soft bandages can also assist you in letting your foot wrapped for long in hot sweaty days. They can feel comfortable on foot, and you should choose them if you don’t find a better bandage that meets your requirement.
You can hopefully find such kind of plaster in the medical shops by making some effort in getting some guidance from shopkeepers.
To the end of this section:
[alert type=”info” icon-size=”normal”]We recommend to use such kind of bandage for your affected foot better, and also keep in mind to select the dressing that you can comfortably hold on your foot for long![/alert]
Crucial tips to follow before wrapping an ankle:
In order to make the bandage sturdy and fit on foot for long, we have suggested some professional tips that can assist you to wrap your ankle strongly. Here’s two:
Make your bandage ready:
After grabbing a bandage, it is recommended to roll it tightly for a once to make it active and stretchy before wrapping it over the foot. It will assist it to quickly set on your foot without facing difficulty in adjustment while the wrapping process.
Start with an additional support:
To make the bandage gain the active support and stay long on your foot, you can use an extra piece of gauze pad on your foot.
Let’s know how to do it!

The thing you have to do is, put either a gauze pad or a doubled piece of cloth to the top end of the ankle (Where the leg comes to an end) as the support with some layers. And simply start covering a portion of the bandage over the gauze pad. [alert type=”warning” icon-size=”normal”]Make sure not to include or even touch the bandage with your ankle, as here you don’t need to cover the ankle.[/alert] [alert type=”info” icon-size=”normal”]
It is the very first thing and the step that you should do in the process of wrapping an ankle, and if you always start with this supportive part, you can surely be able to access the further steps and can learn to wrap your ankle professionally.
So, we recommend that the starting point of your bandage should be with this supportive step to make it work effectively on your affected foot and can stay balanced for long. [/alert]
To this end, here comes the time to learn how to wrap an ankle sprain correctly!
How To Wrap an ankle:

After acquiring the needy items, here it comes time to begin the steps by step process to know how to wrap an ankle:
- The way to under-wrapping (First Step)
- Fix the bandage (Second Step)
- Time to wrap a final bandage (Third Step)
The way to Under-wrapping (The first step):
The Under-Wrap is in other words, a pre-wrapping coat on the affected foot that assist in powering up the dressing so that it will not loose sooner.
(In simple words, it is the first layer of dressing that you have to wrap on your affected foot.)
So here at first, you need an Under-wrap bandage, a kind of light plaster that is used beneath the actual dressing:

So, after wrapping the supportive bandage, continue the wrapping process by taking it down in “V” direction and cover your ankle.
Keep the Under-wrap going further on the direction of your ankle and pass it out inside of your foot in the “X” shape angle.
Now, at last, reach the Under-wrap to the starting point as well the supportive place where you had begun the wrapping process.
Fix the bandage (Second Step):
After the previous step, here comes the time to tape up the last end of the Under-wrap with the supportive part thoroughly.
So, now you have to fix up the entire Under-wrap with the medical/dressing tape. Wrap the tape with exact direction and place like you did previously with the Under-wrap bandage.
More specifically, apply a layer of medical tape over the under-wrap with the same manner.
Apply an additional tape as supportive ones to let the bandage not loose until you don’t want to unwrap it. Take a separate long piece of tape, stick its one end on the top/center of your foot and pass another over the heel and simply tape the second end on the first ones.
More specifically, this supportive tape wrapping should be in an “X” angle on the top of your foot by overlapping one end with another; this will help to result in a strong bond with the layer of the tape.
Note: Keep the pieces of tape ready before starting the Under-wrap process, as it will assist you to wrap without hurdles.
Time to re-tape the ankle:

In this part, start re-taping the ankle and take it on the curve direction like you did while in the starting of the Under-wrap process.
Continue the step by taking the tape from the lower of your foot and reach it under the arch direction and return the tape to your ankle.
(This step is all about the “8” angle-wrapping process; you only have to keep the shape of this number and go in the direction of it.) [alert type=”info” icon-size=”normal”]Repeat this “8” direction taping process with a new long strip of tape just as you did before. The repetition is to overlap the previous tape coat with the new ones.[/alert]
The end of Under-wrap, taping and the supportive part:
This section of dressing was all about a pre-wrapping of your foot which is an essential part of effective dressing that helps in making it sturdy.
By applying the above steps correctly, we believe that you can easily keep your foot wrapped for a long time until you are not free from an ankle issue.
So, if you correctly apply these all, you are now allowed to follow the third and essential part of wrapping an ankle.
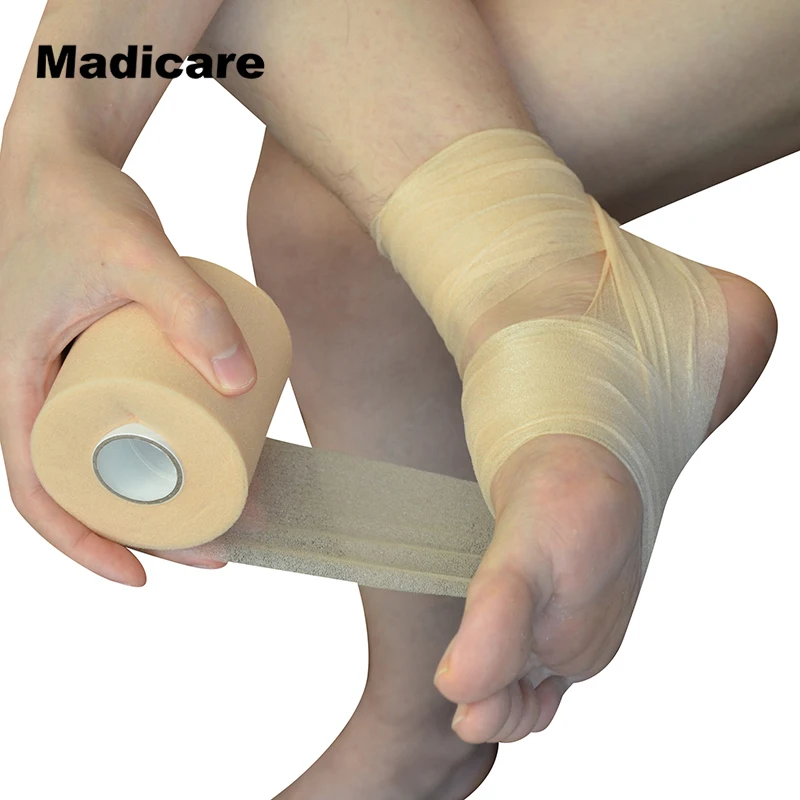
Time to wrap a final bandage (Third step):

After successfully implementing the above steps, here you are on the way to learn how to wrap the topmost, the final and the central bandage that will entirely cover up your ankle as well as your foot!
First – Wrap the bandage:
Start wrapping your foot at a slight upper place where your toes start. In simple words, where your toes meet the foot. [alert type=”info” icon-size=”normal”]Make sure not to wrap any of your fingers.[/alert]
Continue wrapping process by taking bandage slightly towards the upper areas of the foot.
Don’t let the bandage loose at any point, keep it tight, but not so much as it will affect the blood flow off from the veins. Also, leave at least a one-inch space from each of the bandage layers.
After you reach the bandage towards the ball of your foot, cover that area two times. Continue moving further until you don’t reach to the ankle.
In simple words, this part was to overlap the bandage entirely on the foot, and when you complete that, move to the second part mentioned below.
Second – wrap ACE bandage:
Here comes the step where you have to cover up your ankle with the ACE bandage.
So, start from the place near your ankle, an area where you have stopped the previous overlapping process. Continue precisely from there and take the bandage forward and cover up your ankle. After overlapping once, keep covering your foot further in the “X” angle.
And after that, take the bandage to the top of your foot where you started the supportive under-wrap, and give it two overlaps.
Third (finishing the wrap-ups) – Grab the clippers or medical tape:
While holding the bandage, stick the final end with the medical tape or a clipper that is primarily used for fixing the dressing.
Tape or clip it well as the top and the last edge of the bandage is responsible for holding and keeping your dressing powered for a long time.

So, it all ends here!
Some tips to keep bandage set for long:

Since a sprained ankle or other incident occurs to your ankle needs a long-term wrapping on your foot, you need to follow some of the tips to let your dressing alive on your foot for weeks.
- While you start wrapping, make sure any overlap is not loosening
- Tape or stick the end of the bandage correctly to avoid from impairing
- If you find and loosening or other weakness in the dressing while you walk, you should unwrap the particular layer and reset it to let it stay until you want.
And… [alert type=”info” icon-size=”normal”]Just follow each of the beginning to end steps we wrote in this article like “X,” “8” and other of the directions, if you do so, we believe that you can quickly become a professional wrapper![/alert]
Conclusion:
So, if you are suffering from either a sprained ankle, foot pain or some other irrelevant issue that requires professional wrapping skill, then you are now near to do it at your home.
By reading each of the steps, angles and the points, and more importantly applying to dress by your own, we believe that you can now easily wrap your and your mate’s ankle whenever you are need of it.
Here the tips, remedies and other of the information comes to an end, and we hope that all of these has finally let you know how to wrap ankle sprain correctly.
If you have got any other tip(s) in mind, please let us know by commenting below or by contacting us here.
Cheers!

